.png)
Top-level tasks are called root tasks. A root task can have any number of child tasks, and these can have child tasks of their own, to any number of levels. Start by clicking on the button to create a new root task:
This will give you a dialog box to add the task.
.png)
In the dialog box, type the description of a root task. For example, your first root task might be "Project planning." Tasklist gives the task a task number, which is one more than the highest existing task number. If you want a different task number (for example, if you have a numbered filing system), enter it in the dialog box.
If you have enabled access to Office 365, Tasklist checks the ![]() checkbox, and adds the task to the Microsoft To Do list that the app made for you when you created the list. If you don't want to make a To Do task for this task, uncheck the checkbox.
checkbox, and adds the task to the Microsoft To Do list that the app made for you when you created the list. If you don't want to make a To Do task for this task, uncheck the checkbox.
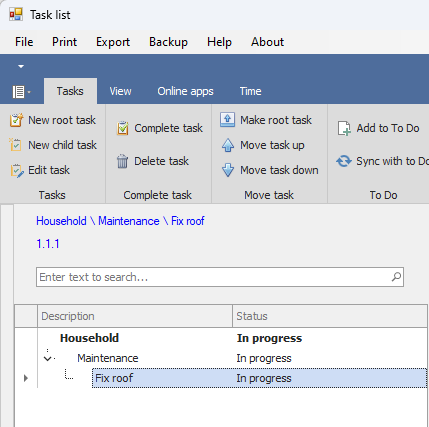
Click ![]() . This will create a new task. You will see the description of the task and the task number in the panel above your task list.
. This will create a new task. You will see the description of the task and the task number in the panel above your task list.
To add a child task, right-click on a task, and select New child task from the pop-up menu, or click on a task, and select ![]() . This will bring up the New child task dialog:
. This will bring up the New child task dialog:
.png)
In the dialog box, enter the name of a second-level task (for example, "List deliverables"). Enter a task number if you like, and click "OK." The app will create a new task as a child of the root task. Tasklist checks the ![]() checkbox to add the new child task to your Microsoft To Do task list as a step of the Project planning task. If you don't want to add the task to your To Do task list, uncheck the checkbox. Read this help topic to learn about synchronizing your tasks with Microsoft To Do.
checkbox to add the new child task to your Microsoft To Do task list as a step of the Project planning task. If you don't want to add the task to your To Do task list, uncheck the checkbox. Read this help topic to learn about synchronizing your tasks with Microsoft To Do.
Right-click on the second-level task and select New child task. A new task will appear in your task list as a child of Maintenance. In this way you can create a tree view of your tasks to any level of complexity.