Filter your task list by category
If you link Tasklist to your Microsoft Office 365 account, you can use your Office 365 categories to categorize your tasks, and you can filter your tasks by category.
You can see how to link Tasklist to your Office 365 account in the topic Linking your task list to Microsoft Office 365.
You can add and edit categories by logging on to your account at office.com, clicking on the Outlook button at the left of the page, and clicking on the Settings icon at the top right:
![]()
On the Settings page, select the General tab, then select Categories:
.png)
Here you can create, edit and delete your categories.
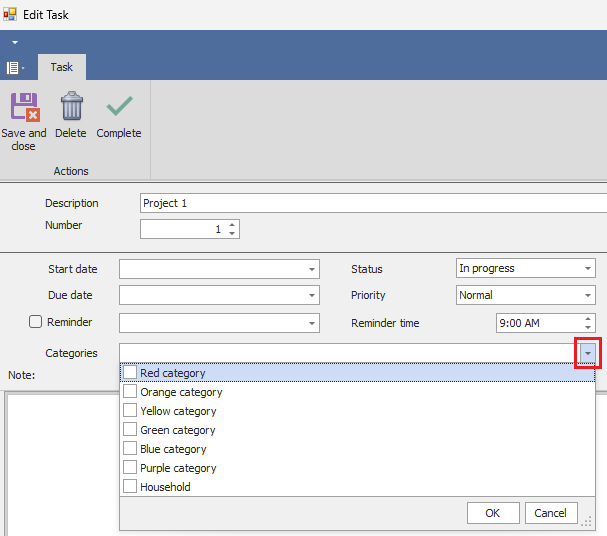
You can assign one or more categories to a Tasklist task by clicking on the Edit Task button in the Tasks tab of the ribbon, or double-clicking on the task, to bring up the Edit Task dialog. Click on the drop-down arrow in the Categories edit box. This will give you a list of your Office 365 categories, and you can select the categories you want to apply to the task.
You can filter your task list by clicking on the Choose a category button in the Tasks tab on the ribbon, and selecting a category from the drop-down list:
.png)
The filtered list will include some tasks that are not specifically assigned to a category. This is because, in addition to the categorized tasks, the filtered list shows the descendants of the categorized tasks, as well as its ancestors to the root task, so you can see the context.
You can clear the filter by clicking the Clear filter button in the Tasks tab on the ribbon.
You can also filter your tasks by adding the Category column to your list, and clicking on the filter icon on the column header. The topic Filter your tasks by other attributes explains how to do this.